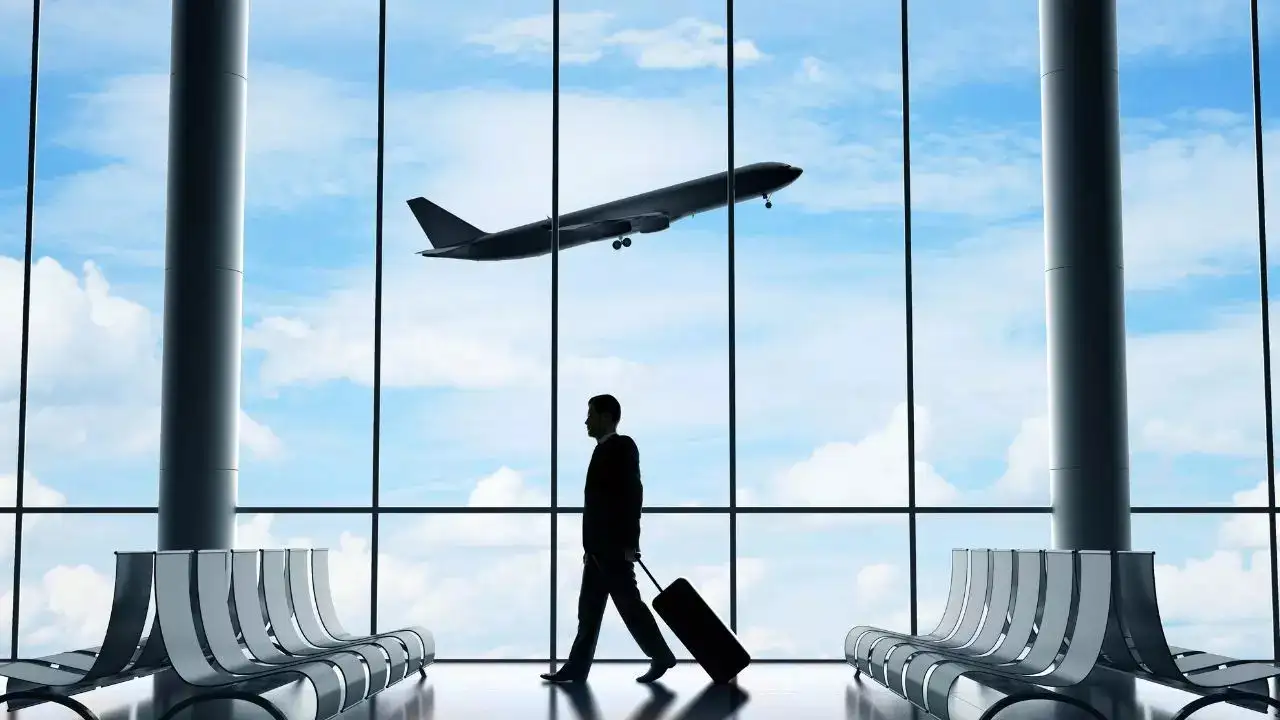
Travel Tips for First-Time Flyers: Everything You Need to Know for a Stress-Free Journey
Introduction: What Every First-Time Flyer Needs to Know
Flying for the first time is a milestone. Whether you’re heading to a dream destination, visiting family across the country, or embarking on a new life chapter, stepping into an airport for the very first time can feel both exciting and intimidating.
You’re not alone — millions of people take their first flight every year, and almost everyone remembers that mix of curiosity and nervous energy before boarding a plane for the first time.
But here’s the good news: air travel doesn’t have to be confusing or stressful — not if you’re prepared.
This guide is written specifically for first-time flyers who want clear, trustworthy advice from experienced travelers.
Unlike generic articles filled with surface-level tips, we’ll walk you through everything you need to know, from booking your ticket to landing safely at your destination — with first-hand insights, industry research, and practical advice that you can trust.
We’re not just giving you a list of what to pack — we’ll help you understand why certain rules exist, how to make smart decisions, and what to expect at every stage of your journey.
Whether you’re flying domestically or internationally, this comprehensive guide will ease your nerves, answer your questions, and set you up for a smooth, enjoyable flight.
So, if you’re wondering things like:
- “What should I do when I get to the airport?”
- “How early should I arrive?”
- “What can I bring on the plane?”
- “Will takeoff be scary?”
- “What if I get lost?”
You’re in the right place.
Let’s take off with confidence — starting with the first step: how to book your flight the smart way.
Booking Your Flight: How to Make Smart Decisions from the Start
Booking a flight might seem simple at first — just search for a ticket and click “Buy,” right? But for first-time flyers, this step is where smart planning can make the biggest difference in your overall travel experience.
Many common first-time mistakes happen during the booking phase — choosing the wrong airline, misunderstanding seat options, or getting surprised by hidden fees.
This section breaks it all down so you can book confidently and avoid costly missteps.
Choose the Right Route: Direct vs. Connecting Flights
If this is your first flight, we highly recommend booking a direct (nonstop) flight if available — even if it costs a little more. Here’s why:
- Fewer chances of missing a connection
- No confusion switching gates or terminals
- Reduced travel time and less fatigue
If you must book a connecting flight, allow at least 90 minutes to 2 hours between flights, especially if you’re traveling internationally.
Airports can be large and unfamiliar, and rushing through security or customs between flights adds unnecessary stress.
Understand Fare Types: Basic Economy Isn’t Always a Bargain
Budget travelers are often tempted by the cheapest fare, but be careful — basic economy tickets come with strict limitations:
- No seat selection (you may get a middle seat)
- No changes or refunds allowed
- Limited or no overhead bin space for carry-ons
- Often board last, reducing available cabin space
Instead, consider paying slightly more for standard economy or main cabin fares, which often include:
- Free seat selection
- More flexibility for cancellations or rebooking
- A more comfortable boarding experience
Pro Tip: Use airline comparison tools like Google Flights, Skyscanner, or Kayak to compare fares, flight times, and inclusions before you book.
Choose a Reputable Airline
Not all airlines are created equal. Some budget carriers cut corners with comfort, punctuality, or customer service. Before booking, do a quick check of:
- Airline reviews on sites like AirlineRatings or TripAdvisor
- On-time performance (some airlines are notoriously late)
- Baggage policies and seat spacing
If flying internationally, check if the airline is part of a respected alliance like Star Alliance, Oneworld, or SkyTeam, which generally means better customer service and operational standards.
When to Book for the Best Price
Airfare pricing is dynamic — it changes based on demand, seasons, and even the day of the week. Here are some data-backed guidelines:
- Book domestic flights around 1 to 3 months in advance
- Book international flights 3 to 6 months ahead
- The cheapest days to fly are often Tuesday, Wednesday, and Saturday
- Set up fare alerts using tools like Hopper or Google Flights to track price drops
Expert Insight: Studies from Expedia and CheapAir.com show that the “prime booking window” for U.S. domestic flights is 21 to 60 days before departure.
Don’t Skip Seat Selection (If You Have the Option)
If you want a smoother experience on the plane, seat selection matters. Here’s how to choose:
- Window seat: Great for views, sleeping, and fewer disruptions
- Aisle seat: Better for easy bathroom access and stretching
- Front of the plane: Quicker exit after landing
- Avoid seats near the restroom (smell, noise, and foot traffic)
Most airlines let you choose your seat during booking for free or a small fee — well worth it for your comfort and peace of mind.
Booking your flight is the foundation of a good travel experience. Make smart decisions early, and you’ll set yourself up for a stress-free journey from the moment you arrive at the airport.
Next up: let’s talk about how to prepare for your trip before you leave home — so you’re not caught off guard on travel day.
Pre-Trip Planning: Get Everything Ready Early
Once your flight is booked, the real preparation begins.
This stage is all about reducing last-minute stress by organizing your documents, understanding the rules, and making sure you’re mentally and logistically ready for travel day.
For first-time flyers, these steps can be the difference between a smooth journey and a chaotic one.
Below is everything you need to have in order before you leave home.
Confirm Your Travel Documents Are Valid
Before anything else, make sure your ID or passport is valid and up to date.
For domestic flights within the U.S.:
- You’ll need a REAL ID-compliant driver’s license or identification card starting May 7, 2025, due to the TSA’s updated security regulations.
- If you don’t have a REAL ID, you must bring a passport or other TSA-accepted identification.
For international flights:
- A valid passport is required — and in most cases, it must be valid for at least 6 months beyond your return date.
- Some countries also require tourist visas, which must be obtained in advance. Check visa requirements at Travel.State.Gov.
Tip: Use Sherpa or your destination country’s government website to see passport and visa requirements based on your nationality.
Check-In Tools & Must-Have Travel Apps
Most airlines open online check-in 24 to 48 hours before departure. You can check in via:
- The airline’s website
- The airline’s mobile app (highly recommended)
- Airport self-serve kiosks (if needed)
Essential apps to download:
- Your airline’s app (for boarding passes, gate changes, flight alerts)
- Google Maps (offline maps feature for your destination)
- Google Translate (download your target language)
- TripIt or App in the Air (for organizing travel plans)
- WhatsApp or Signal (for international communication)
Pro Tip: If your airline app allows, save your boarding pass to your digital wallet so you don’t need Wi-Fi or mobile data at the airport.
Print or Save Important Documents
Even if you plan to use digital copies, it’s wise to print backups in case your phone dies or loses service.
Make copies of:
- Boarding pass
- Flight confirmation
- Hotel reservations
- Emergency contacts
- Passport & visa (especially for international travel)
Keep them in a travel wallet or organized folder that’s easy to access at security and customs.
Know the Airline’s Baggage Policy
Each airline has its own baggage rules, and ignoring them can cost you both time and money. Before packing:
- Confirm how many carry-on and checked bags are included in your ticket
- Check weight and size limits (for example, 50 lbs max for checked bags is common)
- Understand the overweight/oversize fees, which can be steep
Expert Tip: Use a digital luggage scale at home to weigh your bags — don’t rely on guessing.
Prep for Currency & Payment Abroad (If Traveling Internationally)
If flying internationally:
- Inform your bank of your travel dates to avoid your card being flagged
- Carry a small amount of local currency for tips, taxis, and emergencies
- Consider a travel-friendly credit card with no foreign transaction fees
- Bring a backup payment method, like a second card or debit card
Also, check if your phone plan includes international roaming — or plan to buy a local SIM card or eSIM at your destination.
Mentally Prepare & Stay Organized
Flying for the first time can bring travel anxiety. Here’s how to reduce it:
- Watch airport walkthrough videos on YouTube to familiarize yourself
- Read airline policies so you know what to expect (boarding process, luggage rules, etc.)
- Create a simple checklist of things to pack and do the night before
- Keep all your essentials (ID, boarding pass, phone, charger) in one easy-to-reach place
Getting these details sorted ahead of time means you can focus on the excitement of your trip instead of worrying about what you might’ve forgotten.
Travel isn’t just about reaching a destination — it’s about having a well-prepared journey from the start.
4. What to Pack (and What NOT to Bring)
Packing smart is one of the most underrated travel skills — especially for first-time flyers.
Airlines have strict baggage rules, airport security has limitations, and your comfort on the plane depends heavily on what you bring (and leave behind).
This section covers exactly how to pack like a pro, what to bring in your carry-on, what goes in checked luggage, and which items you should never take with you to the airport.
Understand the Difference: Carry-On vs. Checked Bags
Carry-On Luggage
- Stays with you on the plane
- Must fit in the overhead bin (usually around 22” x 14” x 9” inches for most airlines)
- Often includes one personal item (like a backpack or purse) that fits under the seat
Carry-on is ideal for short trips, avoiding baggage fees, or reducing the risk of lost luggage.
Checked Luggage
- Stored in the plane’s cargo hold
- Has larger size limits (usually up to 62 linear inches combined)
- Subject to weight limits (typically 50 lbs / 23 kg)
Only check a bag if necessary — and always remove valuables like electronics, medication, cash, and travel documents.
Important: Some budget airlines charge extra for both checked and carry-on bags, so check your fare details before packing.
Follow the TSA 3-1-1 Rule for Liquids
Airport security rules strictly limit the type and quantity of liquids in carry-on bags. Here’s the TSA 3-1-1 rule:
- 3.4 ounces (100 ml) or less per container
- All liquids must fit in 1 quart-sized, clear plastic zip-top bag
- 1 bag per passenger
Examples of regulated liquids:
- Shampoo, lotion, hand sanitizer, toothpaste, perfume, etc.
Anything larger than 3.4 oz must go in checked baggage — or it’ll be confiscated at security.
What to Pack in Your Carry-On (Essentials Only)
Your carry-on should contain everything you’ll need during the flight or in case your checked bag is delayed. Here’s a smart list:
In-Flight Comfort & Entertainment
- Headphones or noise-canceling earbuds
- Eye mask, travel pillow, lightweight blanket or shawl
- Tablet, book, journal, or downloaded Netflix shows
Personal Essentials
- Snacks (protein bars, crackers, nuts)
- Reusable water bottle (empty when going through security, refill afterward)
- Lip balm, hand sanitizer, facial wipes
- Extra mask (if preferred), tissues
Important & Irreplaceable Items
- Passport/ID, boarding pass, printed documents
- Prescription medications (in original packaging)
- Wallet, credit cards, emergency cash
- Power bank and charging cables
Tip: Always carry at least one change of clothes in your carry-on, especially for international flights — just in case your checked luggage is delayed or lost.
What NOT to Bring on a Plane
Avoid packing the following in your carry-on or checked baggage:
| Prohibited in Carry-On | Prohibited in Checked Bags |
| Large bottles of liquid or gel | Lithium-ion batteries not attached to a device |
| Sharp objects (scissors, knives) | Flammable items (lighter fluid, fireworks) |
| Sporting equipment (baseball bats) | Compressed gases (spray paint, tear gas) |
| Tools longer than 7 inches | Explosives or ammunition (unless declared) |
Check TSA’s “What Can I Bring?” tool at tsa.gov for a full list of banned items.
What to Wear for Maximum Comfort
Dress in layers — airports and planes often have inconsistent temperatures. Choose:
- Comfortable, loose-fitting clothing
- Slip-on shoes (to speed up security)
- A light jacket or hoodie
- Socks (for comfort and hygiene)
Avoid heavy jewelry or belts when flying — they’ll just slow you down at TSA.
Packing with purpose helps you avoid unnecessary fees, breeze through security, and stay comfortable throughout your flight.
Don’t overthink it — bring what you need, skip what you don’t, and always double-check your airline’s rules.
Getting to the Airport: Be Early, Be Smart
The day of your flight can be both exciting and stressful — especially if it’s your first time.
One of the most common rookie mistakes first-time flyers make is underestimating how long everything takes.
From traffic delays and parking confusion to long security lines, there are many variables that can turn a well-planned trip into a frantic rush.
In this section, you’ll learn exactly how early to arrive, how to get to the airport, and what to do if time isn’t on your side.
How Early Should You Arrive?
The recommended arrival time depends on whether your flight is domestic or international:
| Flight Type | Arrival Time Before Departure |
| Domestic (U.S.) | 2 hours |
| International | 3 hours |
This gives you enough time to:
- Check in (if you haven’t done so online)
- Drop off checked bags
- Pass through airport security
- Locate your gate (some airports are huge)
- Use the restroom, grab food, or relax before boarding
Tip: If you’re flying during peak travel times (holidays, summer, weekends), add at least 30 minutes extra to the guidelines above.
Transportation Options to the Airport
You’ve got several ways to get to the airport — each with pros and cons depending on where you live, what time you’re flying, and your travel budget.
1. Rideshare (Uber/Lyft)
- Convenient and hassle-free
- No parking required
- Good for travelers with light luggage
- Can surge in price during peak hours or bad weather
2. Taxi or Airport Shuttle
- Airport shuttles are cheaper than taxis for long distances
- Taxis are more predictable but more expensive than rideshares
3. Public Transportation
- Budget-friendly option
- Risk of delays or needing multiple transfers
- Ideal for solo travelers or backpackers
4. Driving Yourself
- Offers the most control over timing
- You’ll need to find parking, which may require a shuttle to your terminal
- Book airport parking in advance to save money
Pro Tip: Use tools like SpotHero or ParkWhiz to reserve parking and compare prices at major airports.
Airport Parking: Know Your Options
Airports typically offer multiple parking types:
- Short-term parking: Closest to terminals, but most expensive
- Long-term parking: Budget-friendly, farther from terminals
- Economy lots: Cheapest option, often require shuttle transport
- Valet parking: Fastest, but very pricey
Plan your parking a day or two in advance so you’re not scrambling when you arrive.
What If You’re Running Late?
If you’re behind schedule, here’s what to do:
- Check in online immediately and head straight to the gate
- Use curbside check-in (if available) to drop your bags faster
- Inform airline staff if you’re running late — they may be able to expedite you
- TSA PreCheck or Priority Lines (if you have access) can help you skip long security queues
- In some cases, airlines may rebook you on the next flight for a fee or standby
Important: Airlines typically close the boarding gate 15–20 minutes before departure. If you miss that, you miss the flight — even if the plane is still at the gate.
Getting to the airport on time isn’t just about avoiding stress — it’s about giving yourself space to deal with the unexpected.
Whether it’s a traffic jam or a slow security line, early arrival gives you the flexibility to handle hiccups calmly.
Inside the Airport: Step-by-Step Guide for Navigating with Ease
For first-time flyers, airports can feel like a maze — full of signs, checkpoints, people rushing by, and procedures you’ve never encountered before.
But once you understand the step-by-step process, you’ll feel much more in control.
This section breaks down exactly what happens from the moment you enter the airport until you board your flight — so you can move through each stage confidently and efficiently.
Step 1: Check-In (Online, App, Kiosk, or Counter)
If you haven’t already checked in online, you’ll need to check in at the airport.
Your options:
- Mobile check-in (via airline app): Fastest and most efficient. Often available 24–48 hours before your flight.
- Self-service kiosk: Scan your ID or confirmation number. Follow the on-screen prompts to print your boarding pass and baggage tag.
- Check-in counter: Ideal if you have questions, special requests, or need to check bags manually.
Note: If your airline or destination requires document verification (e.g., passports, COVID requirements, visas), you may still need to check in at the desk even if you’ve done mobile check-in.
Step 2: Baggage Drop-Off
If you have checked luggage:
- Take your tagged bags (from the kiosk or desk) to the baggage drop area
- Airline staff will scan them and load them onto your flight
- Keep your baggage receipt — it’s proof in case your luggage is delayed or lost
Make sure your bags are:
- Locked or secured with a TSA-approved lock
- Properly labeled with your name and contact info
- Under the airline’s weight and size limits
Pro Tip: If your bag is even slightly overweight, you may be asked to repack or pay excess fees (which can be $50–$100+). Weigh your bag at home beforehand.
Step 3: Security Screening (TSA or Equivalent)
This is one of the most important — and often intimidating — steps for new flyers. But it’s quite manageable if you’re prepared.
Here’s what happens:
- Show your ID and boarding pass to a TSA agent
- Place your items on a conveyor belt to be scanned
- Laptop and electronics: in a separate bin
- Liquids: in a quart-size bag
- Shoes, belts, jackets: removed and placed in a bin
- Laptop and electronics: in a separate bin
- Walk through a scanner or metal detector
Common mistakes to avoid:
- Forgetting to empty water bottles (must be empty before screening)
- Leaving loose change or metal in your pockets
- Trying to carry large liquids or gels
Tip: TSA PreCheck (U.S. only) allows you to skip some of these steps, like removing shoes and laptops, and typically has shorter lines.
Step 4: Find Your Gate
After security, you’re officially “airside” — past the checkpoint and ready to head to your gate.
Your boarding pass (paper or digital) will show:
- Gate number (e.g., B12)
- Boarding time
- Departure time
Use the airport signage or app to find your gate. At larger airports, this may require taking a shuttle, monorail, or walking through long corridors.
Once at your gate, double-check the screens for:
- Flight number
- Destination
- Gate changes or delays
Important: Gates can change — always listen for announcements and monitor the flight displays.
Step 5: What to Do While You Wait
You’ll usually have time before boarding. Use this window to:
- Go to the restroom (do it before boarding!)
- Eat or grab snacks (airport food is pricey, but it’s convenient)
- Fill up your empty water bottle
- Charge your devices
- Relax and mentally prepare
Some airports offer free Wi-Fi, meditation rooms, or even lounges (accessible with certain credit cards or day passes).
Step 6: Prepare for Boarding
Boarding usually begins 30 to 45 minutes before departure and closes 15 minutes before takeoff.
You’ll board in groups or zones (listed on your boarding pass). Airline staff will call groups one by one.
When your group is called:
- Have your boarding pass and ID ready
- Walk through the gate scanner
- Follow signs to your jet bridge and aircraft
Make sure you keep your essentials with you — your carry-on bag goes in the overhead bin; your personal item (backpack or purse) goes under the seat.
Airports may look complicated at first, but they follow a universal rhythm — check-in → security → gate → boarding. Once you’ve done it once, you’ll feel much more at ease the next time.
Boarding and In-Flight Experience: What to Expect on the Plane
Stepping onto an airplane for the first time is exciting — but it can also feel like stepping into the unknown.
What happens after you board? What does takeoff feel like? Is turbulence dangerous? How do you stay comfortable on long flights?
This section gives you a clear, calm, and practical walk-through of what to expect from boarding to landing — so you feel fully prepared and at ease in the sky.
The Boarding Process: Step-by-Step
After your boarding group is called, here’s what to expect:
- Scan your boarding pass (mobile or paper) at the gate.
- Walk down the jet bridge to the aircraft.
- A flight attendant will greet you at the door — don’t be afraid to ask questions.
- Locate your seat (it’s printed on your boarding pass — e.g., 18A).
- Stow your carry-on in the overhead bin, and your personal item under the seat in front of you.
- Take your seat and buckle your seatbelt — low and tight across your lap.
Tip: Overhead bin space fills up quickly. If you’re in a later boarding group, your bag might need to be checked at the gate (usually free of charge).
Plane Seating & Cabin Etiquette
Airplanes are compact spaces, so respecting personal space and following etiquette is key:
- Middle seat passengers get both armrests — it’s an unspoken rule.
- Keep your feet, hair, and elbows in your own space.
- Use headphones if you’re watching a movie or listening to music.
- Ask, don’t recline suddenly — especially on short flights.
- Don’t rush to stand or grab bags when the plane lands. Wait until it’s your turn.
Takeoff: What It Feels Like
Takeoff is one of the most thrilling parts of flying — and totally normal:
- You’ll hear the engines roar louder as the plane accelerates.
- You’ll feel a slight push back into your seat during lift-off.
- Your ears may “pop” due to air pressure changes — yawning, swallowing, or chewing gum helps relieve this.
- Once you reach cruising altitude (usually around 35,000 feet), things level out and quiet down.
First-time flyer reassurance: Pilots and aircraft are trained to the highest global safety standards.
Commercial flying is one of the safest modes of travel in the world.
Landing: What to Expect
Landing feels like the reverse of takeoff, but slightly bumpier:
- You may feel the plane descend gradually and the cabin pressure change.
- You’ll hear landing gear deploy and feel a slight drop as the plane touches down.
- The brakes engage quickly — you’ll hear the engines reverse and feel a strong deceleration.
- Once the plane stops at the gate, wait for the seatbelt sign to turn off before standing.
Tip: If you’re nervous, distraction is your best friend — play music, read, or chat with your neighbor to ease anxiety during descent.
In-Flight Services: Food, Drinks, and Entertainment
Food & Beverages
- Most flights offer complimentary beverages (water, juice, soda, coffee).
- Domestic short-haul flights may offer snack packs or food for purchase.
- International or long-haul flights typically include full meals, snacks, and drinks.
Hydration Tip: Cabin air is dry. Drink water regularly and avoid too much caffeine or alcohol.
Entertainment
- Some planes have seatback screens with movies, TV shows, games, and music.
- Others require you to use your phone or tablet to stream entertainment via the airline’s app.
- Bring your own headphones (and a backup pair just in case).
Pro Tip: Download movies, shows, podcasts, and books before you fly, especially if your plane doesn’t offer Wi-Fi.
Staying Comfortable in the Air
For Short Flights (1–3 hours):
- Stay relaxed, stretch occasionally, and bring light reading material.
For Long Flights (5+ hours):
- Get up to walk the aisle every 1–2 hours to improve circulation.
- Use a neck pillow, eye mask, and blanket to nap or rest.
- Dress in layers to stay warm, as cabins can get chilly.
- Wear compression socks if you’re prone to swelling or poor circulation.
If You Feel Motion Sickness:
- Choose a seat over the wing (least turbulence)
- Use motion sickness bands or medication
- Stay hydrated, look at a fixed point, and avoid heavy meals
Flying doesn’t need to be uncomfortable or scary — once you know what to expect, it becomes just another part of the journey.
With a little preparation and the right mindset, you’ll feel like a seasoned traveler in no time.
Arrival & Customs: Navigating the Final Stretch
You’ve landed — but your journey isn’t over just yet. For first-time flyers, the arrival process can be confusing, especially at international airports where customs and immigration procedures are involved.
This section explains what to do after you land, including how to exit the plane, claim your baggage, clear customs (if needed), and find transportation to your final destination.
It’s your final stretch, and being informed will help you finish strong.
Deplaning: Getting Off the Aircraft
Once the plane reaches the gate:
- The seatbelt sign will turn off, indicating it’s safe to stand.
- Don’t rush — passengers exit row by row, starting from the front.
- Be mindful of overhead bin contents — bags may have shifted during the flight.
- Check your seat and seatback pocket for any forgotten items (passport, phone, glasses, etc.).
First-time tip: If you’re not in a hurry, let others exit first. This reduces crowding and lets you disembark calmly.
Immigration & Passport Control (International Flights Only)
If you’ve flown internationally, you’ll go through immigration/passport control before entering the country.
Here’s what to expect:
- Follow signs for “Arrivals” or “Passport Control.”
- Stand in the appropriate line:
- “Citizens/Residents” if you’re returning to your home country.
- “Visitors” or “Non-residents” if you’re entering a foreign country.
- “Citizens/Residents” if you’re returning to your home country.
- Present your passport and visa (if applicable) to the officer.
- Be prepared to answer questions like:
- Why are you visiting?
- How long will you stay?
- Where will you stay?
- Why are you visiting?
In some countries (like the U.S.), your photo and fingerprints may be taken. Most procedures are straightforward — just stay calm and respectful.
Time-saving tip: Some countries offer e-Gates or mobile passport control apps for faster processing.
Baggage Claim: Picking Up Your Luggage
Once through immigration, follow signs to Baggage Claim. Here’s what to do:
- Look at the monitors to find your flight number and carousel number.
- Wait at the correct carousel for your suitcase to arrive.
- Check each bag carefully before picking it up — many look alike.
If your luggage is missing or damaged:
- Go to the airline’s baggage service desk, usually located nearby.
- Provide your baggage tag (you received it during check-in).
- Fill out a Property Irregularity Report (PIR) to track or claim compensation.
Pro tip: Add a bright luggage tag or ribbon to your suitcase so you can spot it easily.
Customs Declaration (International Only)
After collecting your baggage, you may be required to declare certain items before entering the country.
Here’s how it works:
- You may need to fill out a customs form (on paper or digitally during flight).
- Officers will check for prohibited items, such as food, plants, large amounts of cash, or expensive goods.
- If you have nothing to declare, you’ll usually be allowed to proceed through the “Nothing to Declare” lane.
Tip: Know the duty-free limits of the country you’re visiting. Items above those limits may incur taxes or be confiscated.
Finding Ground Transportation After You Land
After customs, you’ll enter the Arrivals Hall — the public area of the airport. From here, you can find transport to your final destination.
Options include:
- Rideshare apps (Uber, Lyft, Grab, Bolt, depending on location)
- Airport taxis (use official stands — avoid random drivers)
- Hotel shuttles (some hotels offer free pick-up — check in advance)
- Airport buses or trains (usually affordable and clearly marked)
- Rental car desks (if you’re driving yourself)
Navigation tip: Use the airport’s free Wi-Fi to access maps, ride apps, or directions if you’re unsure where to go.
Getting Connected: SIM Cards & Wi-Fi (International)
If you’re abroad and need internet:
- Many airports sell local SIM cards or offer eSIM activation booths.
- Connect to free airport Wi-Fi to notify family or call a ride.
- You can also pick up a prepaid travel SIM before your trip for easy activation upon arrival.
By the time you’ve exited the airport, you’ll have experienced every major step of air travel — and gained the confidence to do it again.
You’ve officially graduated from first-time flyer to independent traveler.
Common Mistakes First-Time Flyers Make (and How to Avoid Them)
Even with the best intentions, many first-time flyers fall into avoidable traps — often due to a lack of experience, rushed decisions, or simply not knowing what to expect.
The good news is, almost every mistake listed here can be avoided with a little foresight and preparation.
Here’s a breakdown of the most common mistakes new travelers make — and how you can steer clear of them.
1. Overpacking or Packing the Wrong Way
The mistake: Packing too much or including prohibited items in carry-on bags.
Why it matters:
- Airlines have strict weight and size limits — extra baggage fees can be expensive.
- Security delays or confiscated items are a common hassle for overstuffed bags.
Avoid it by:
- Weighing your bag before you leave home.
- Knowing the TSA 3-1-1 rule for liquids.
- Using a packing checklist (and sticking to it).
- Packing light and leaving room for souvenirs.
Pro tip: Bring a foldable tote bag in your luggage — it’s useful for overflow on your return trip.
2. Arriving Late at the Airport
The mistake: Cutting it too close and risking a missed flight.
Why it matters:
- Airlines often close the boarding gate 15–20 minutes before departure.
- Unexpected delays like traffic, long lines, or gate changes are common.
Avoid it by:
- Arriving at the airport 2 hours early for domestic and 3 hours for international flights.
- Checking in online to save time.
- Planning your route and transport the day before.
Always build a 30-minute buffer — especially for early-morning flights or during holidays.
3. Not Downloading or Using the Airline’s App
The mistake: Relying solely on email confirmations or paper documents.
Why it matters:
- Airline apps give you real-time flight updates, gate changes, digital boarding passes, and delay notifications.
- Some even allow for in-flight entertainment and Wi-Fi access.
Avoid it by:
- Downloading the airline app right after booking.
- Logging in and enabling notifications.
- Saving your boarding pass to your phone’s wallet or files app.
4. Not Understanding Fare Rules and Seat Options
The mistake: Choosing the cheapest ticket without knowing the restrictions.
Why it matters:
- Basic economy often doesn’t allow seat selection, ticket changes, or refunds.
- You could end up in a middle seat for 10 hours with no way to change it.
Avoid it by:
- Reading the fare details carefully before booking.
- Paying a little more for flexibility and comfort (especially on longer flights).
- Checking seat maps in advance using SeatGuru.
5. Ignoring In-Flight Comfort
The mistake: Wearing the wrong clothes or forgetting key comfort items.
Why it matters:
- Planes get cold, seats are tight, and flights can be long.
- Discomfort leads to fatigue, stress, or even mild health issues.
Avoid it by:
- Dressing in comfortable layers and wearing slip-on shoes.
- Bringing an eye mask, neck pillow, earplugs, and snacks.
- Walking/stretching during long flights to avoid stiffness or swelling.
6. Not Preparing for Customs or Immigration
The mistake: Not knowing entry rules, visa requirements, or declaration processes.
Why it matters:
- You could be denied entry, fined, or detained for violating customs laws.
- Unprepared passengers slow down the process for everyone.
Avoid it by:
- Researching visa and entry requirements using Travel.State.Gov or Sherpa.
- Declaring any duty-free purchases, food items, or cash over allowed limits.
- Having all documents ready and answering questions clearly.
7. Losing Important Travel Documents
The mistake: Misplacing your passport, boarding pass, or luggage tags.
Why it matters:
- Lost documents can delay your trip, cost money, or create legal issues.
Avoid it by:
- Keeping all travel documents in a secure, accessible travel wallet.
- Taking photos or scans of your passport, visa, ID, and flight details.
- Keeping a copy in your email or cloud storage as backup.
8. Failing to Plan for Internet Access or Communication
The mistake: Assuming your phone will “just work” when you land.
Why it matters:
- Without roaming or a local SIM, you may have no data access for navigation, rideshare, or translation.
Avoid it by:
- Checking with your mobile provider about international roaming plans.
- Buying an eSIM or local SIM card for data abroad.
- Using airport Wi-Fi until you get connected.
9. Skipping the Research
The mistake: Going in blind without knowing the airport, airline policies, or your destination.
Why it matters:
- Lack of preparation leads to stress, missed information, or avoidable mishaps.
Avoid it by:
- Watching airport walkthroughs on YouTube for a visual idea of the process.
- Reading airline-specific travel rules on their official site.
- Using Google Maps and Street View to preview your destination or hotel area.
Mistakes are part of learning — but by understanding these common pitfalls, you can skip the trial-and-error phase and fly with the confidence of a seasoned traveler.
Remember, the goal is not just to reach your destination — it’s to enjoy the journey getting there.
Expert Tips & Travel Hacks for First-Time Flyers
Now that you understand the process and how to avoid common mistakes, it’s time to level up your experience with insider travel strategies.
These are the kinds of tips that seasoned travelers use to save money, stay comfortable, and reduce stress at every step of the journey.
Whether you’re flying domestic or international, these expert-approved hacks will help you fly smarter — not just this time, but every time after.
1. Join the Airline’s Loyalty Program (Even for One Flight)
Most airlines have free loyalty programs (like Delta SkyMiles, United MileagePlus, or American AAdvantage). Even if you only fly once a year, joining earns you:
- Travel points/miles (can be redeemed later)
- Easier check-in and tracking
- Access to travel deals and promotions
Bonus tip: Sign up before you book so your frequent flyer number is added to your reservation automatically.
2. Bring Noise-Canceling Headphones or Earplugs
Airplane cabins can be loud — think crying babies, engine hum, or chatty passengers. Noise-canceling headphones are a travel game-changer, helping you:
- Sleep better
- Enjoy in-flight entertainment
- Stay relaxed during turbulence or busy boarding
If you’re on a budget, even basic foam earplugs can reduce cabin noise significantly.
3. Pack a Power Bank (and Universal Adapter if Going Abroad)
Not all planes or airports have working outlets. A portable charger (power bank) ensures your phone stays alive for:
- Boarding passes
- Communication on arrival
- Entertainment during the flight
For international travel, bring a universal plug adapter to keep your devices powered anywhere in the world.
4. Use a Travel Wallet or Document Organizer
Keep everything essential in one place:
- Passport
- Boarding pass
- Credit cards and cash
- Hotel reservation
- Emergency contact info
It reduces the chance of losing something and makes it easier to breeze through airport checkpoints.
Pro Tip: Choose a travel wallet with RFID-blocking technology for added identity protection.
5. Use Seat Selection Tools to Get the Best Spot
Not all airplane seats are created equal. Use websites like SeatGuru to see:
- Legroom info
- Proximity to bathrooms
- Reclining issues
- Seat width and power outlets
Then, when booking or checking in, manually select the best seat available.
6. Stay Hydrated (And Limit Alcohol)
Cabin air is pressurized and very dry, which can quickly dehydrate you. Here’s what helps:
- Bring a refillable water bottle (empty through security, fill before boarding)
- Sip water often throughout the flight
- Avoid excess caffeine and alcohol, which can worsen dehydration and jet lag
Hack: Ask for a full bottle of water from the flight attendant instead of a small cup.
7. Wear or Pack a Light Scarf or Shawl
Planes can get cold quickly — and the provided blankets (if available) aren’t always clean or warm. A large scarf or shawl works as:
- A makeshift blanket
- A travel pillow
- An eye cover for sleeping
- A stylish layer at your destination
It’s one of the most versatile travel items you can carry.
8. Take Photos of Important Items
Before heading to the airport, snap pictures of:
- Your checked luggage (for identifying lost bags)
- Passport and ID
- Travel insurance or prescriptions
Save these in your phone’s cloud, email, or notes app for backup access anywhere.
9. Download Offline Tools & Maps
Avoid data roaming costs and bad connections by preparing your phone ahead of time:
- Download offline Google Maps of your destination
- Save PDFs or screenshots of hotel info and addresses
- Load offline entertainment: movies, books, playlists, podcasts
Even if you land with no internet, you’ll still be ready to go.
10. Learn a Few Phrases in the Local Language (If Traveling Abroad)
Knowing just a few words like “hello,” “thank you,” and “help” in the local language can make a huge difference.
It shows respect, builds trust, and can help you navigate unfamiliar places more easily.
Use apps like Google Translate or Duolingo for quick learning and real-time translation.
Flying for the first time isn’t just about getting from point A to B — it’s about building skills, confidence, and enjoyment for every trip after.
These expert tips can turn you from a first-time flyer into a savvy traveler who knows how to travel smart, stay calm, and enjoy the journey.
Final Words of Encouragement: Your First Flight Is Just the Beginning
Congratulations — you’ve just walked through everything a first-time flyer needs to know, from booking your ticket to landing at your destination.
That’s no small thing. Air travel can seem overwhelming at first, but as you’ve now seen, it’s all about preparation, awareness, and a calm mindset.
Every experienced traveler — no matter how confident they look — was once in your shoes, figuring it all out one step at a time.
And truthfully, no one knows everything about flying; even frequent flyers are still learning, adapting to new policies, airports, and international rules.
But here’s the thing: you don’t need to know it all — you just need to know enough to stay calm, think clearly, and ask for help when you need it.
You’re Not Alone in the Sky
It’s easy to feel like everyone else in the airport knows exactly what they’re doing. But the truth is:
- Many passengers are just as anxious or confused as you.
- Airport staff and flight attendants are there to help — they’ve seen everything.
- Fellow travelers are often kind and willing to help if you simply ask.
Your First Flight is a Confidence Builder
After this flight, the mystery is gone. You’ll know:
- What to expect from airports, planes, and security checks.
- How to handle delays, check-ins, and boarding gates.
- What to pack and how to feel comfortable in the air.
The second time you fly, you’ll feel more confident. The third time, you might be helping someone else find their gate or weigh their luggage. That’s how quickly things change.
This is the Start of Your Travel Story
Flying opens up the world. It brings you to:
- New cities, countries, and cultures.
- Long-distance friends, family, and future adventures.
- A better understanding of the world — and yourself.
And it all starts with one ticket, one gate, and one plane.
Final Checklist Before Your First Flight
Let’s wrap up with a quick summary you can screenshot or save:
Book your flight smart: consider route, airline, and fare rules
Check travel documents, visa, and health requirements early
Pack light and follow TSA rules for carry-ons
Arrive early, stay calm, and follow airport signs
Stay hydrated, comfortable, and entertained in-flight
Be respectful of other passengers and cabin etiquette
Use expert tips to maximize comfort, safety, and peace of mind
Ask for help when needed — that’s what airport staff are for
One Last Thing…
Bookmark this guide, share it with another first-time flyer, or keep it on hand for your next trip.
Flying may seem intimidating at first, but once you’ve done it, you’ll realize how empowering and exciting it really is.
Here’s to your first flight — and the many journeys ahead.
Safe travels!